How to Grow Indigo (Persicaria Tinctoria)
Legacy is the word I think of when I think of Indigo. It is a plant that holds so many mysteries that I’ll never tire of learning about its ways. Since entering a relationship with Indigo, my worldview, my art and my relationships have expanded tremendously.

Persicaria Tinctoria flowering
It started with the first time I purchased a pouch of Indigo pigment from an online supplier and followed the instructions to make my first vat of dye. The instructions seemed so complicated that I began to wonder why this plant in particular requires so much human intervention to give up its divine blue pigment to cloth.
Preparing Indigo is not like any other natural dye. It must be made soluble with a reducing agent before it can be used as a dye. If we just add Indigo powder to water it will remain in pigment form, suspended, but not dissolved. When the Indigo is reduced, it dissolves and the dye bath is a greeny-yellow color. My first attempt was successful and I dyed a number of lovely hemp/silk eco-printed cloths for making decadent shoulder wraps. However, I can’t say I understood the process much at all. I simply followed the instructions step by step. By my third Indigo vat I had the process down well and hosted a workshop at Magical Botanical Studio.


With my curiosity piqued, I decided to give growing Indigo a try. Upon research I learned there are many varieties of Indigo that are suited to various climates. The one I decided to grow is Persicaria Tinctoria, which I purchased from Strictly Medicinal Seeds. The germination was slow, but I got a great crop. I didn’t know what to do with it yet, however, and the leaves became sun scorched by the intense heat dome we experienced in Southern Oregon that year. I waited for them to flower and go to seed, collected the seeds at the end of the growing season and committed to learning how to process Indigo the next year.
Throughout the experience of dyeing with and growing Indigo, I kept getting a feeling in my gut that there was a big story behind it. In particular, I felt a sense of the mysterious process not belonging to me. I wondered who held the knowledge of working with this plant historically and felt that I must owe them consideration and respect. I remained curious, but patient and kept planting seeds, growing it and learning from it.
I learned to dye using fresh leaf Indigo. The process is quite simple. Just sprinkle some salt on fresh leaves and macerate it thoroughly alone, then together with your target cloth. It makes the best greeny teal color this way! And no mordant is necessary for it to be permanent.


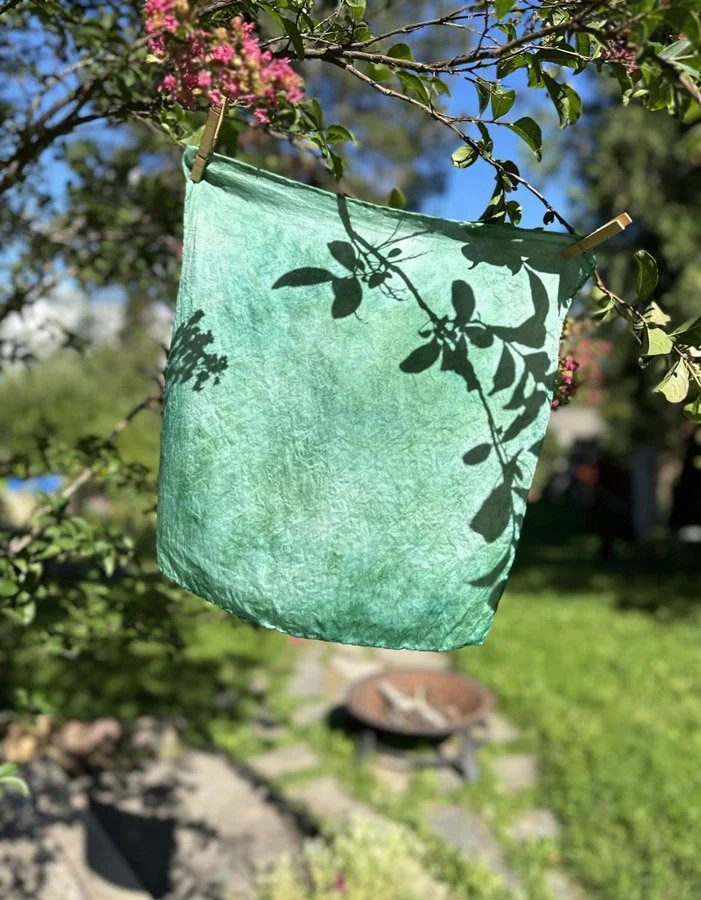

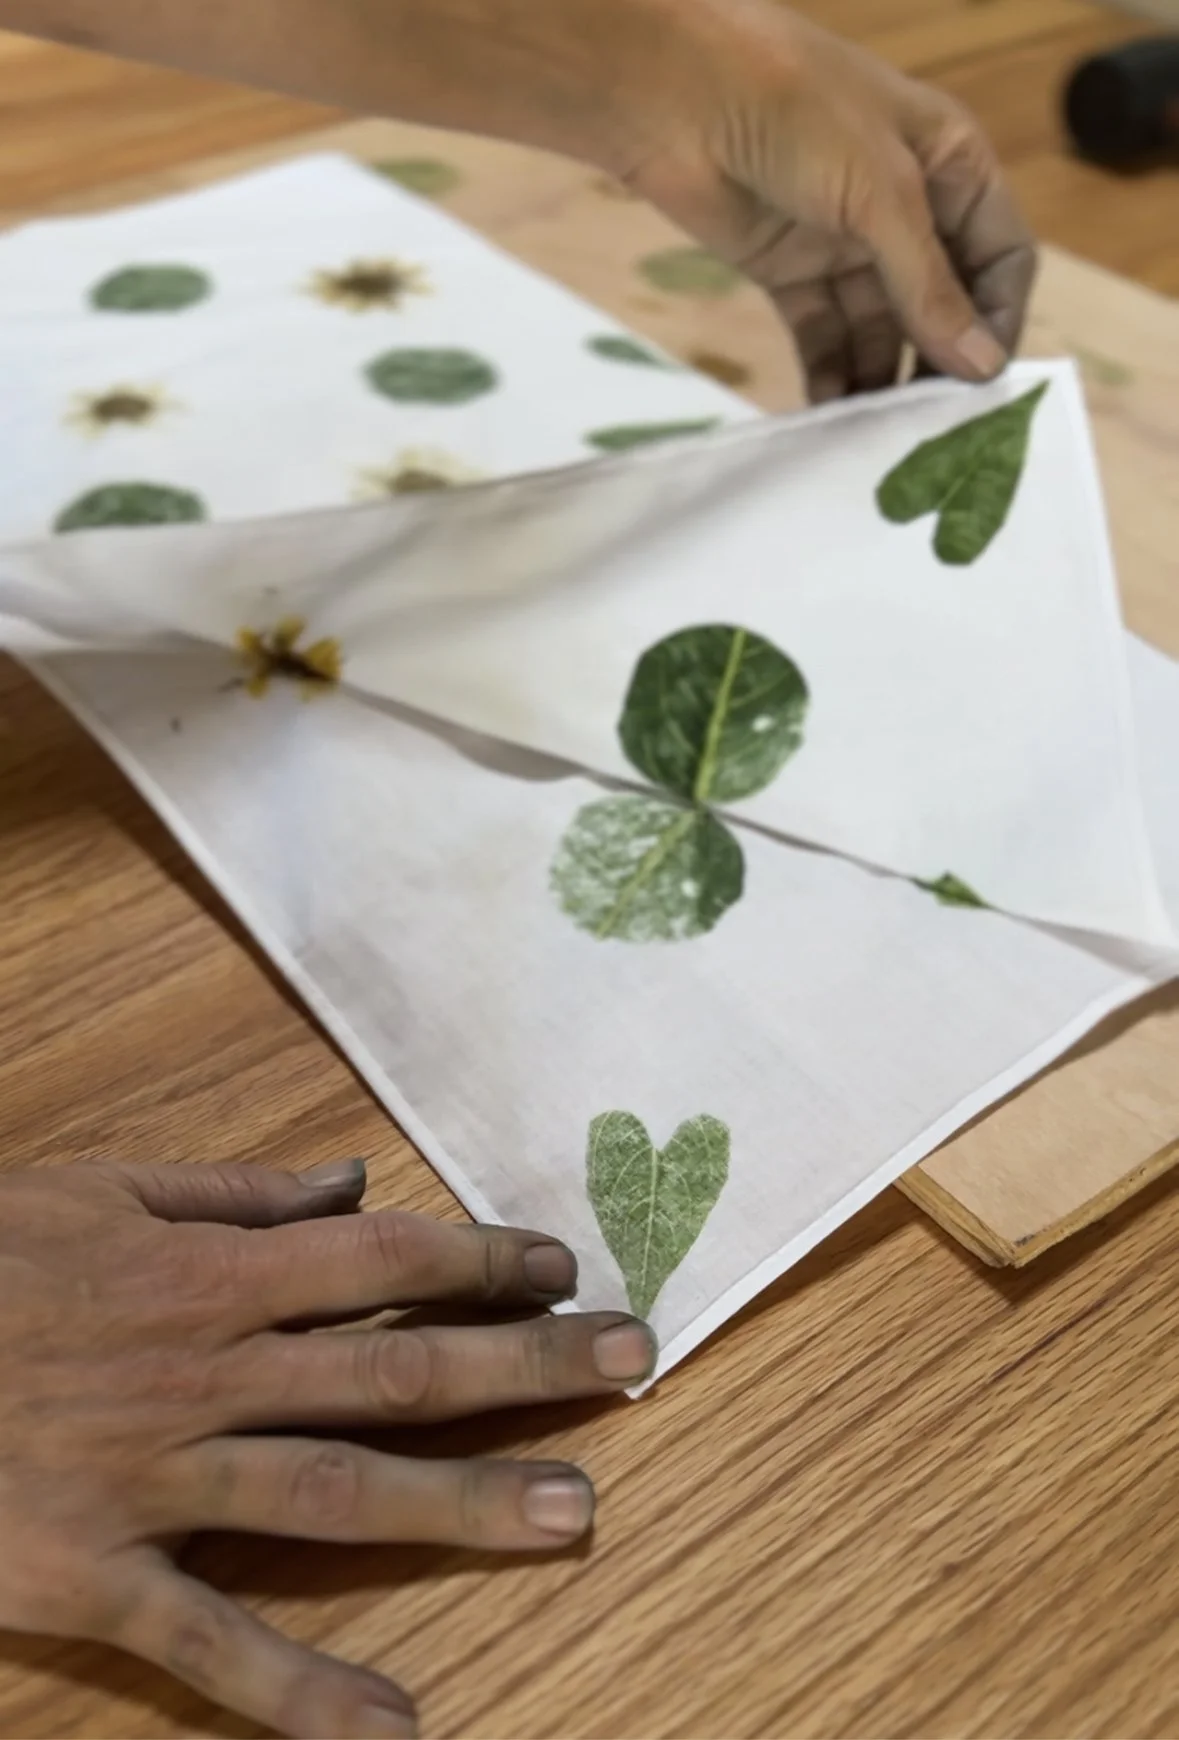
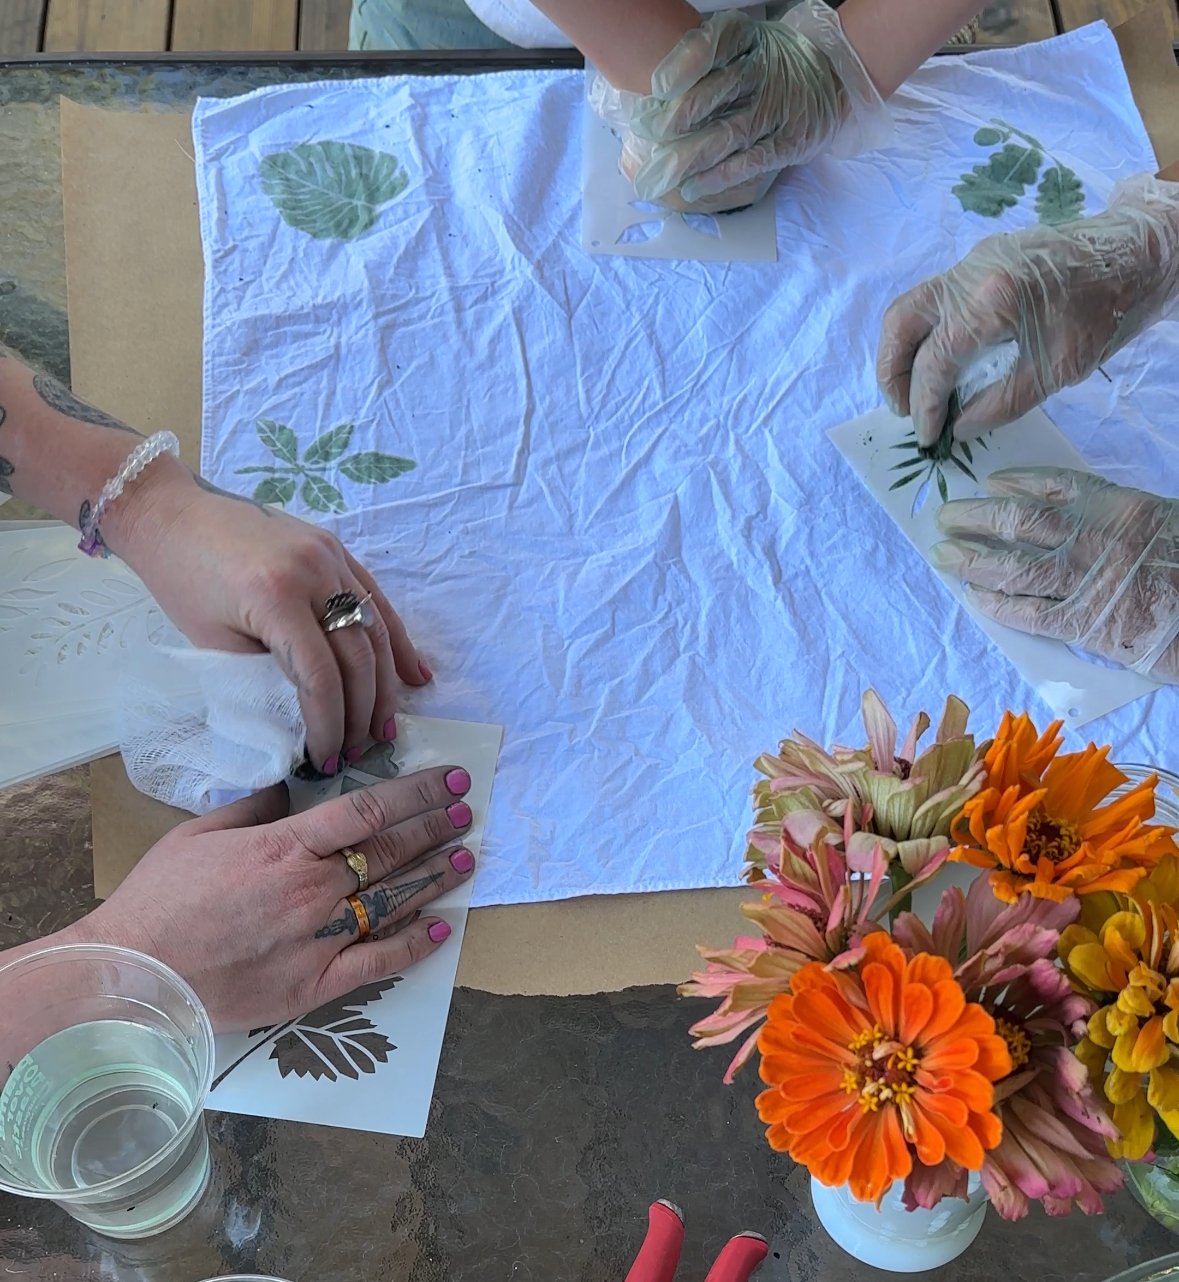
In addition to using the fresh leaves for dye, Indigo leaves can also be applied to cloth using the Japanese Hapa-zome technique. The leaves are pounded with a hammer leaving their imprint permanently on the cloth. At first the print is green like the leaf, but after oxidizing in the air, it turns blue. You can also bundle salted and macerated fresh indigo leaves in cheese cloth and apply the pigment with stencils.


I was so enamored with this dye plant that I spent all winter watching videos and reading articles about how to make pigment from the fresh leaves. The dry powdered pigment can be stored and used to make a vat along with a reducing agent of fruit and a base of lime.
The following spring, I started my Persicaria Tinctoria seeds early in the greenhouse on heat mats. They jumped right up with this method of germination and the Indigo dyeing season was off to a great start. I interplanted my Persicaria Tinctoria with Giant Zinnias to add a little pop of color to the bed, knowing the Indigo prefers a little shade and would grow lower than the Zinnias. This year I noticed when the weather started to turn quite hot in June, and I put a light shade wall up to protect them from the late afternoon sun without shading the Zinnias.


That September the magic happened. I put the first harvest of leaves in water, put a plate over it and held it down with a jar of water, and after a couple days the water turned an amazing metallic purplish copper. It was time to remove the leaves, adjust the pH with lime and aerate.


When I say magic happened, I’m referring to a transformation imbibed with a soul.
Something was activating not just scientifically or chemically, but it was as if the Indigo came alive, revealing its transformational nature for me to reverently witness. As I mechanically aerated the leaf tea, blue bubbles began to appear and the liquid itself turned a greenish-yellow. According to the instructions I was reading, this meant that the Indigo had become soluble. It was time to settle out the pigment by allowing the bath to sit undisturbed for a day or so. The pigment settled to the bottom of the bath and the solution was ready to be decanted to leave behind only the pigment.
After decanting, I poured the remaining thick pigment water through paper coffee filters and set them over my fireplace to dry out. Once completely dry, it was time to grind it to a powder in a mortar and pestle.


The lengthy process was mesmerizing and engaging, thrilling the parts of me that love long term processes that settle my nervous system and heal the adverse consequences of our fast paced digital age. Through the entire process, I was in a flow state with all my senses awake and online. The auditory sound of the water swishing, the olfactory scent of fermenting leaves, the visual experience of blue suspended in water, contrasting leaves and iridescent changing blues to teals to greens and the tactile feeling on my skin of the leaves, softened water and grinding of the powder against marble to a fine dust, together vitalized my soul.
Now that I was fully awake to this plant’s sensory language, the voice of its history and lineage became more urgent, and I felt ir-response-able for manipulating and extracting it without first engaging in a relationship with its rich historical, cultural, political, creative, spiritual and economic context.
Decolonizing Color
One day at Lithia Artisan’s Market, where I only had one small set of indigo dyed napkins for sale due to my hold on working with indigo to study its history, I came upon a woman who told me about the incredible biographical novel, Indigo: in Search of the Color that Seduced the World. With reverence, curiosity and humbleness I continued my education with Indigo and devoured the book in 2 days.
Author Catherine E. McKinley describes how Indigo had been the backbone of West Africa’s northern economy. Indigo was a means for West African women to make inroads with colonial and traditional economies and structures of power. As such, it was a means for women to amass great wealth and unprecedented autonomy. Indigo is also entwined in slavery as the slave trade routes that shipped the estimated 600 million humans to their forced indenturement in the US, the colonies and Europe were routes previously traveled on foot and by bicycle of large caravans of Ghanian and Nigerian indigo cloth traders. Indigo’s substantial economy represented both economic subsistence for West Africans and an opening to one of the worst human atrocities of the colonial project. At the turn of the 20th century the introduction of chemical blues by a German company fatally undercut indigo wealth when it opened for business in West Africa in the 1960’s, co-opting the indigo markets whose legacy belonged primarily to Ghanaian and Nigerian women.

Morado Corn Dyed Samples
I’ve long been involved in the work of anti-racism, decolonizing and abolition. In fact, when I sold my screen printing business in 2019, it was largely to seek out a way to bring all the things that matter the most to me together into one vocation.
Discovering the history of Indigo was a surprising and delightful integration of the activism, art and land based resilient living that have characterized my whole adult life.
My relationship with Indigo feels deliciously complicated and has sent me on a journey to discover more ways to make blue, because this blue does not feel like my own. I will continue to grow Persicaria Tinctoria, to fresh leaf dye with it, and to extract the pigment from its leaves to vat dye. But, rather than its color being a commodity I use to produce products for market, I prefer to remain a student of this plant, like the way I am a student of Black history.
“History is not just facts and events. History is also a pain in the heart. And we repeat history until we are able to make another’s pain in the heart our own.” ~Julius Lester
Decolonization is a process of remembering and reclaiming, a callback to the divine, a return to who we are. I believe that we were all indigenous to someplace, to some time and our task is to listen to the land we are on now; to listen to the plants. Indigo told me it’s history was rich and needed to be heard because my heart was receptive while working with it. Many herbalists believe that the herbal medicine most needed for your ailments will often just show up within 50 feet of your door. This year my indigo crop is struggling, as did my cosmos, but my black magic bachelor buttons, black knight scabiosa, morado corn and black hollyhocks are all thriving. Guess what dye colors they make? … Blue.


How to grow Indigo (Persicaria Tinctoria) in the Pacific Northwest
Where to get seeds:
From me! https://www.sunnyjlindley.com/studio/dyers-garden-seed-collection
Strictly Medicinals https://strictlymedicinalseeds.com/product/dye-plants-seed-collection-8-seed-packets-organic/
Grand prismatic seed: https://www.grandprismaticseed.com/dye-plants
When to plant: early March or 6-8 weeks before last frost
Indigo seeds tend to have a low germination rate. This is because we don’t quite have a long enough growing season in the PNW for them, so not all the seeds reach full maturity before the first killing frost. In addition, germination rates steadily decline from age 6 months onwards. At 12 months of age few if any seeds will germinate even when sown in good conditions. For this reason, I plant 3 seeds per hole.
Plant them ⅛” deep and tamp the soil down to prevent the light seeds from eroding when you water.
Start on heat mats in a greenhouse or indoors under grow light. The extra heat helps them germinate faster.
Sow seeds shallowly and provide warmth, light and even moisture. To aid in germination, seeds may also be soaked for 12-24 hours in advance.
Seed starting mix
In a 5 gallon bucket combine:
2 gallons hydrated coconut coir
2 gallons sifted compost
2.5 cups vermiculite
1 ⅓ cups bat guano
1 ⅓ cups fish bone meal
½ cup kelp meal
Days to germination: 10-24
Days to maturity: 75
Once plants have 5 or more true leaves, and your last frost date has passed, they are ready to be transplanted outdoors. Choose a day that the weather will be cool. If you can’t do it on a cool weather day, plant them in the evening and provide a shade cover for them for the first couple of days.
Choose a good location. Indigo doesn’t prefer hot afternoon sun. It wilts and stresses the plants and causes the leaves to become sunscalded. Consider planting indigo where it will get ample morning and midday sun and receive bright light but not direct sun in the late afternoon. Along an east facing wall is a great choice or on the east side of a taller crop. Another option is to plant Indigo with a companion that provides some afternoon shade.
Plant 12 inches apart in rows 12” apart. Good companions for Indigo are Purple Zinnias and Dye Sunflowers.
In a full sun location, you can cover your crop with row cover to prevent sunscald, construct a shade wall to only block afternoon sun, or grow it under a 30% shade cloth.
Harvesting
Take the first harvest when plants have reached 18-24 inches and you begin to see the early formation of a seed head. Don’t take all of it. Leave 10-20% of your bed for a seed crop.
You can use this harvest to dye using the fresh leaf indigo method, dry the leaves for Michele Garcia’s quick indigo vat method, or begin soaking the fresh leaves for pigment extraction.
Cut the plant down to about 4 leaf branches on each plant. It will grow back readily.
The second harvest will be ready in September. It’s best to watch for your first frost date and wait as long as possible to get the maximum amount of leaves and seeds.
If you want to extend your Indigo growing through the winter, you can bring some of this harvest indoors and root it for plants. Simply make cuttings of the number of plants you want and place them in a jar of water. They will readily sprout roots. When roots are sprouted, trim off flowers/seed head and pot them up for winter growing.
Start by harvesting the seed heads from the tops. Consider putting some of your seed heads in a jar of water to give them a couple extra weeks to reach greater maturity, thus, better germination.
Next cut the crop all the way to the ground. I like to lay my whole harvest on a sheet and pick all the undesirable leaves off first. Next, pick all the leaves off the stems and either place them in a bucket for making pigment, use them fresh for fresh leaf indigo dyeing, or lay them out on a screen in the shade to dry.
Saving and cleaning indigo seed:
How to know when the seed is mature: Indigo seeds should be plump and rounded and a solid black color. Watch for them to be busting out of their seed chaff.
Allow the seed to dry completely in the open air as this will help the chaff to come off more easily. Gently rub the seeds on a fine screen to remove the chaff.
Winnow the seeds. Do this by placing your seeds and chafe in a bowl and run a blow dryer or fan on them while gently tossing the bowl. This will blow away the chaff if you’ve rubbed the chafe off first.
Store your seeds in a cool, dry location away from direct sunlight.
In spring, consider doing a germination test. This will help you to know how many seeds to plant per hole to save space and ensure a successful quantity of germination for the size crop you want to grow.
To perform a germination test, put ten seeds between 2 layers of damp paper towel and tuck it into a plastic bag. Place in a warm location like on top of a fridge. Check them every two days or so and re-wet if necessary. After 10-24 days you should see germination. Add a zero to the number that sprout out of the 10 seeds and that is your percent germination rate. For instance, if 8 out of 10 sprout, you have an 80% germination rate.